Setup Reverse SSH Tunnels
If you want to open a dedicated connection from your bastion server to our tunnel server, it is best to set up a reverse tunnel. This way, all connections to your DB will look as if it originates from your bastion server, and all data transfer will securely go through the tunnel.
Set up Reverse SSH Tunnels Automatically
1. Introduction
With our automated bash script, connecting Holistics to your data source using a reverse tunnel is much faster and more convenient.
NOTE: The script supports Debian and RHEL based distros. For other systems, please see this doc on setting up the tunnel manually.
2. Guide
- Enter the Display Name of the data source and choose your Database Type.
- Choose Use reverse tunnel
- Fill in the
HostandPortwhere your database can be accessed from your proxy server. NOTE: If your database in on an AWS machine, specifyinglocalhostmay not work, so use the machine's local IP instead (e.g. '172.31.2.1')

- Click
Generate Scriptand wait for the script to be generated

- Copy the command and execute it on your proxy/bastion server. Note that you should not prepend the command with sudo, because some packages will be installed for current user only. You will be asked for superuser privileges to install packages and set up system services later. See the last section to know all the actions that the script carries out.

- Read the script introduction and follow the script execution
- Return to your browser when this message appears:

- The database configurations will now appear on your form. Fill in and click
Test Connection

- If the test is successful, you can finish by clicking Save Data Source

- After the data source is saved, the reverse tunnel will be running in a system service called
h_autossh. Note that the display of the status varies between systems.

3. The h_autossh service
As described in Script Operation / Final steps below, the reverse tunnel script creates a service for you to manage all tunnel connections to Holistics, and runs them automatically on startup.
How to use the service:
- to start all Holistics tunnels, run
sudo service h_autossh start - to stop all Holistics tunnels, run
sudo service h_autossh stop - to restart all Holistics tunnels, run
sudo service h_autossh restart - to see the status of Holistics tunnels service, run
sudo service h_autossh status
4. Removing Reverse Tunnel
For data sources using reverse tunnel connection, when you click Delete, we will generate another script for you to execute on the proxy server.

This script removes the reverse tunnel (associated with the chosen data source) from h_autossh and restarts the service.
If the reverse tunnel being removed is the last tunnel in h_autossh (i.e. you do not have any other reverse tunnel), the h_autossh service will also be removed.
Finally, the data source will be deleted.
5. Script Operations (Automated)
The script takes the following actions (in order):
Create Holistics Directory Creates a directory to store all files related to the whole process.
Full path:$HOME/.holisticsInstall Packages The script will try to install two main packages:
- **curl:** Used to communicate with Holistics web server. `nss` is also updated if possible so that `curl` can handle SSL connection properly.
- **autossh:** Used to handle the tunnel connection and keep the connection persistent. For distros using `yum` package manager, `autossh` is not always available (such as in RHEL 6). In this case, `gcc` and `make` will also be installed to compile `autossh` from its source. If you want to install `autossh` by yourself instead, please install it prior to the script execution, and the script will **not** try to install it again.
Generate RSA key pair and submit public key to Holistics A new key pair will be generated in Holistics directory using
ssh-keygen. If the key pair exists, for example when you have already set up another tunnel, the existing key pair will be used. Then, the public key is submitted to Holistics web server. Holistics will add your public key to the tunnel server so that SSH connection can be established, and also assign a specific port on the tunnel server for your new connection.Start the reverse tunnel The script creates a reverse tunnel SSH connection from your proxy server to our tunnel server. The port on the tunnel server will be the one assigned by Holistics, and the port on your server is the one you configured in the data source form. Afterward, the script will notify Holistics web server about the running tunnel.
Create/Update
h_autosshservice At the point the script tells you to return to the browser, it starts waiting for your data source result. If the data source is saved successfully, the script will stop the reverse tunnel that was made previously. Then, it creates a new service calledh_autossh, which is stored in/etc/init.d/and contains the command to run the reverse tunnel. If the service exists, the script will update it to include the new tunnel configuration. The service is also enabled to run on startup.
6. Troubleshooting
When there is an error with the Data Source that you connected using the automated script, please perform these checks:
Run
sudo service h_autossh statuson the proxy server to see whether the reverse tunnel service is runningCheck if your proxy server can connect to the database successfully using:
ping <database_host_ip>telnet <database_host_ip> <database_port>- A database CLI. For example, using
mysql:
mysql -h <database_host_ip> -P <database_port> -u <db_username> -p
If all the above checks return successful results, please send the output of the above commands to [email protected] and we will help you with further troubleshooting.
Set up Reverse SSH Tunnels Manually
1. Introduction
In case your system does not use Debian or RHEL based distros or use Windows, please follow these steps to set up reverse SSH tunnels manually.
2. Set up in Linux environment
We will use autossh to create the reverse SSH tunnel. autossh manages the SSH connections automatically and restarts it when it dies/drops off. In other words, we will have a more persistent tunnel with it.

1. Generate SSH Key Pair
Generate a new SSH key pair with:
ssh-keygen -t rsa -b 4096
When asked for a passphrase, press 'Enter'. A pair of files will be created as per the path you entered.
Already Have A Key Pair
If you already have a key pair, please ensure your private key is only readable by your user account:
chmod 400 <path_to_your_private_key_file>
Send Us Your Public Key
After that, send us the public key (file ~/.ssh/id_rsa.pub) at [email protected] so we can add it to our tunnel server. In the mail, please also include the reason why you would like to set up the tunnel manually instead of using our automated script.
We will confirm with you after we have installed your public key and send you the available secured ports to connect to. Make sure you receive the confirmation from us before you continue with the steps below, otherwise the commands will fail.
2. Set Up Tunnel
Install autossh:
sudo apt-get update
sudo apt-get install autossh
We will run autossh in a screen. You can also run it as a background daemon, but that is more difficult to manage. Install screen package with sudo apt-get install screen, then run:
screen -S holistics
Now that you're inside a screen, run:
autossh -M 0 -N -o "ServerAliveInterval 60" -o "ServerAliveCountMax 3" \
-R *:[tunnel_port]:[yourdb.server.com]:[db_port] \
[email protected] -p 50022 \
-i <path_to_your_private_key_file>
Before you run, change the second line to reflect the connection string to your database server:
-R *:[tunnel_port]:[aws.ip.to.redshift.com]:[redshift_port]
Example of a command:
autossh -M 0 -N -o "ServerAliveInterval 60" -o "ServerAliveCountMax 3" \
  -R *:20032:db.somehost.com:5432 \
  [email protected] -p 50022 \
  -i ~/.ssh/id_rsa
In the above example:
- Your DB host is:
db.somehost.com, port5432(PostgreSQL) - The tunnel port you choose is:
20032
Notes:
[tunnel_port]is the port we will use when connecting totunnel.holistics.io. We have opened up the range20000:20100for tunneling purposes, so if you create a second tunnel, please pick a port in this range.- We have restricted traffic for
tunnel.holistics.ioport20000:20100to only the Holistics web server, so connecting to these ports from other computers will not be allowed.
About GNU screen:
- To exit the screen:
Ctrl-a d - To enter the screen again:
screen -x holistics
3. Add New Data Source
Now open Holistics to add a data source using the credentials you have. Enter the following host & port:
- Host:
tunnel.holistics.io - Port:
[tunnel_port]
Select Direct connection because we are not using the automation script

You should be good to go.
3. Set up in Windows environment
- Download Putty via https://www.putty.org/
- Open PuttyGen
- Generate new key pairs
- Enter passphrases and save private key
- Copy the public key and save it in a text file

- Send the public key to Holistics Support at [email protected], and then receive the port range
- Download Bitvise SSH Client (Tunnelier) via https://www.bitvise.com/download-area
- Open Tunnelier
- Fill in the ‘Server’ section as in the next screenshot 10. Click ‘Client key manager’
- Click ‘Client key manager’

- Import the private key (.ppk) file which was saved in step 4
- Fill in the Authentication section as above
- In the tab Options, disable everything in On Login section
- Go to S2C tab, add a new rule:
- Listen Interface: 127.0.0.1
- List. Port: one of the ports received in step 6
- Destination Host: host of SQLServer
- Dest. Port: listening port of SQLServer (default is 1433)
- Save Profile
- Login
Set up SQL Server Security for User login
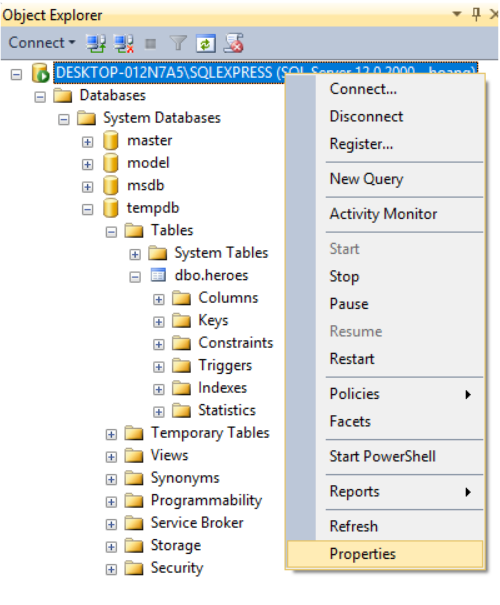
Login to your server in SQL Server Management Studio Right-click on server -> Properties -> Security
In Server Authentication, choose SQL Server and Windows Authentication Mode -> OK